This document was updated February 15, 2018 12:02 PM.
- New in 3.6 is the notion of Export Scripts. Check them out! There's one for specifically packaging up Double Click ads, so you can essentially 'one click' export your Double Click ads: http://tumult.com/hype/export-scripts/ - Head over there and install it. The process of using it is super easy.
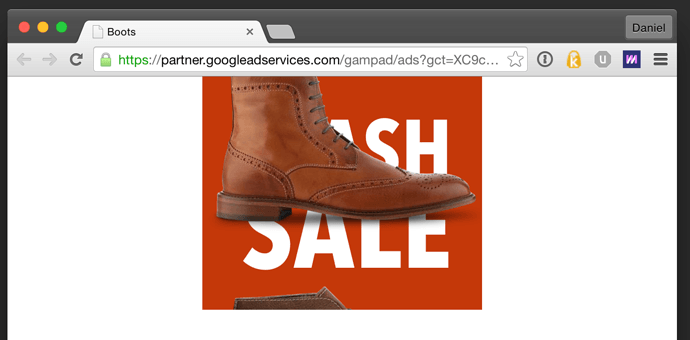
- The video on this thread shows some basic workflow & example for building a successful advertisement with Tumult Hype.
- Working with Expanding Banners? Check out this example from @jonathan.
- This post shows what the Export Script does without any code. The information below shows a manual workflow.
The below instructions are meant for folks who are more comfortable manually modifying code and want to know what's going on under the hood:
Prepare your Tumult Hype document
First, setup your Ad size match one of the available creative sizes supported by DFP.
Download the attached file to follow along with other setup steps: bootsad.zip (971.3 KB)
This page explains how to get an HTML5 document prepared for DFP:
https://support.google.com/richmedia/answer/2672545?hl=en&ref_topic=2672541&rd=1
Filename considerations
Don't use spaces, foreign characters, or symbols in your document name when exporting:
- Good: 300x340v3
- Bad: Version 3 (300 x 300)
Doubleclick will display an error if your document name is too long, or if you have any spaces or foreign characters in your document name.
Images
- The only image formats supported by DFP are jpg, png, and gif.
If you're curious about what Hype exports (and what each file does) please read this post.
Add the Enabler
First, add the enabler to the head of your document:
<script src="https://s0.2mdn.net/ads/studio/Enabler.js"> </script>
This allows tracking impressions and clicks in the creative.
Handle Ad Loading
At a minimum, you need to make sure your document doesn't load until the enabler has loaded. Please look at the EnablerListener script to see how we accomplish this. On the Main Timeline, the Tumult Hype document is paused. Only when the Enabler has loaded do we 'continue' the timeline with this function:
hypeDocument.continueTimelineNamed('Main Timeline', hypeDocument.kDirectionForward);
DFP offers other options for loading. You can load the ad when the content on the page has fully loaded, or only when the ad is visible. Those options are explained here. I have also gone ahead and added the relevant functions to the EnablerListener function for easy access. Just move the 'continueTimeline' function above into your preferred location.
Create an Exit
The other requirement is setting up an HTML5 Exit. This tracks actual clicks on your ad. Please see this thread for the most recent method of creating an exit:
Use a Macro to define the exit URL
Another method of creating an exit is to run a JavaScript function that loads a URL macro. To do this, add the function below to the <head> of your document. You can edit the contents of the <head>…</head> of your exported .html file by clicking on 'Edit HTML Head' in the Document Inspector:
function clickURLTriggered() {
  window.open('%%CLICK_URL_UNESC%%',
  '_blank' // <- This could be _self to open in the same window.
);
}
This variable would be replaced with the actual URL on document load by the enabler you use and will open the URL in a new window.
In Hype, you can run this function 'On Click' for the element you choose:
clickURLTriggered();
Use a CDN
Now that your document is ready to go, export your document to your computer, and then upload it to a CDN.
In my test I uploaded it to a S3 bucket with cloudfront enabled. This is a highly performant CDN with edge locations all around the world. The example below uses standard S3 bucket URLs, but a Cloudfront URL would look like this: https://dvrsamfw89lsr.cloudfront.net/BootsAd/bootsad.html
I uploaded my bootstest.html document to the following directory:
http://cloudfrontzone.s3.amazonaws.com/BootsAd/
I then edited my bootsad.html document and made some adjustments so that HYPE.js and the Generated .js file are both loaded from absolute URLs. First, I included a reference to HYPE.js in the head of the document:
<script src="//cloudfrontzone.s3.amazonaws.com/BootsAd/bootsad.hyperesources/HYPE-458.full.min.js"></script>
I also modified the source of the generated JS file:
//cloudfrontzone.s3.amazonaws.com/BootsAd/bootsad.hyperesources/bootsad_hype_generated_script.js?74860
I use // instead of http:// so that the ad correctly appears on unencrypted and encrypted pages.
Polite Loading
The DoubleClick enabler has functions built in which detect if your document has loaded. You can run this function 'On Scene Load' to perform certain actions based on whether your document has been downloaded fully, is visible, or both:
Using Adwords?
Start here: Google Adwords (Google Ads) Best Practices
The information below is the manual approach:
If you're deploying this ad on Adwords, you'll be uploading a ZIP file to their server. Currently, Adwords throws an error based on Hype's Script reference, which includes a query string:
"/bootsad.hyperesources/bootsad_hype_generated_script.js?74860"
Just remove that string if you're uploading to Adwords so that it reads:
"/bootsad.hyperesources/bootsad_hype_generated_script.js"
Testing Time
Make sure your Exits are being tracked, and make use of console.log entries to ensure other events have been logged.
