Hi Carey!
Here is an example of one way to sync video & sub-titles: VideoSyncDemo_JHSv1.hype.zip (2.3 MB)
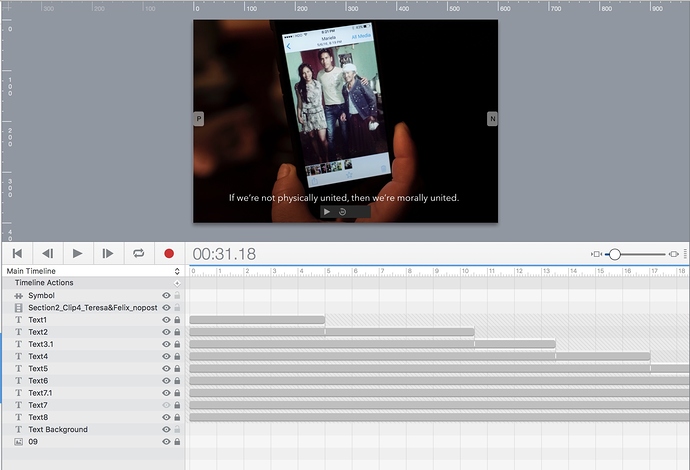
In this demo the video & Hype project timelines are synced for "Play" and "Pause" operations; additionally You can "scrub" the video playhead back and forth on the video media player's timeline and the Hype project timeline sets itself to match the video.
Demo here.
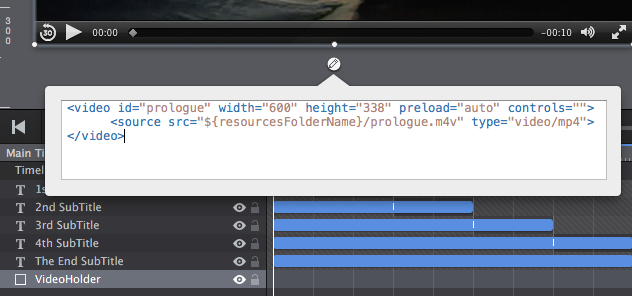
Upon opening the Hype project You will see in the "Main Timeline" layers a rectangle element called "VideoHolder"; in the innerHTML of that element is the following script:
**Note:** to view the _innerHTML_ of an element...
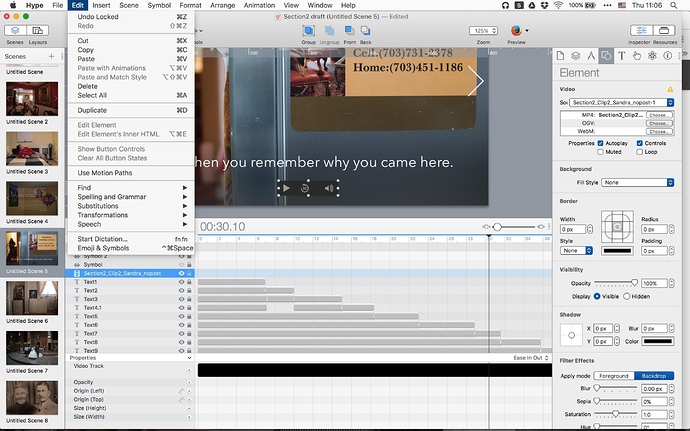
> Select the element then choose:
"Edit" menu > "Edit Element's Inner HTML" _(keyboard shortcut: option-command-E)._
You can read more about _innerHTML_ [here](http://www.w3schools.com/jsref/prop_html_innerhtml.asp).
This code in the innerHTML is called a "video tag". We will manipulate the video using this approach instead of dragging the video directly into Hype's main animation window.
I have given this video tag an ID of "prologue" - You would use your own ID name. Also I have set the height, width and other parameters of the video. The source pathway of the video is identified in the tag as:
source src="${resourcesFolderName}/prologue.m4v"
The resourcesFolderName is a substitution variable for the document's resources folder and is used to reference documents added via Hype's Resource Library.
prologue.m4v is the name of my video file - replace it with the name of your video.
So, at this point we have covered the innerHTML of the rectangle element used to contain the video file. One more thing - the code to sync the video with the timeline.
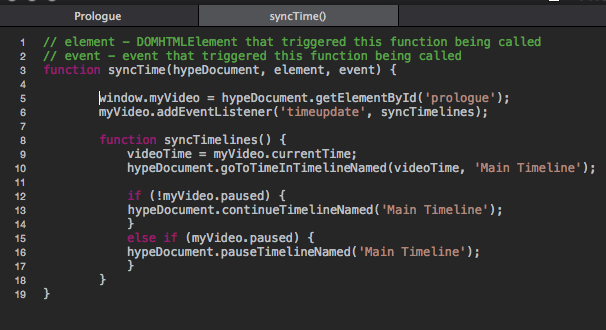
The function "syncTime()" appears in a tab just above Hype's main animation window - click on this tab to view this function in the code editor.
Since it appears You are brand new to JavaScript coding, etc. there is no point in going into details of the code at this time. The only thing for You to do here is replace the ID in the line near the top:
window.myVideo = hypeDocument.getElementById('prologue');
Replace prologue with the ID named You used in the video tag of the innerHTML of the VideoHolder rectangle element - make sure You keep the quotes around the name.
The function is triggered by the "On Scene Load" event which is found in the "Scene Inspector" near the bottom of the Scene Inspector's pane:
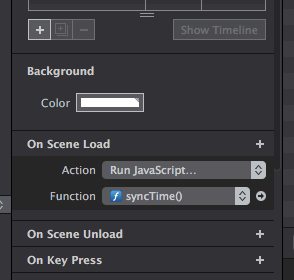
We're done!
Note: You can use an audio file instead of a video, and use animated images that are synced to the audio's timeline. (What follows below is not in the Demo file - it is an example only in this post).
The code is almost identical - the only difference is a slight variation in the innerHTML of the VideoHolder element:
The video tag now becomes an audio tag and a different file type, in this case ".mp3", type="audio/mpeg":
<audio id="prologue" width="60%"  preload="auto" controls="controls">
	<source src="${resourcesFolderName}/prologue.mp3" type="audio/mpeg">
</audio>
Since an audio file has no "official" height such as a video would have, we will use the height of the browser's default audio player (though You could change this situation - but that's for another post). Also we will set the width of the audio media player to a percentage of the VideoHolder element that contains it. Above I used 60% - i.e. the audio player is 60% of the VideoHolder's width.
The code in the "syncTime()" function would stay the same, but many of the variables have "video" in the name (i.e. "myVideo"). Everything will still work but You may wish to change the variable name to something like "myAudio" - or "myMedia" - if You are using both video & audio... it is a good practice to have variable names match the mission (or at least not be misleading).
