You can add any selector above. I have suggested “body” but you could do this for individual elements.
####If you have downloaded your fonts
you would need to add them to your resources folder and then follow the instructions in the documentation to add them to your project. Be careful that any “src” you need to add uses the special resources folder variable to point to your fonts e.g:
The problem is as follows. I have added the code to the Head from typography.com and can see the typefaces within Hype locally. When I publish to the live site the typefaces aren’t picked up.
I have tried adding the body declaration with my chosen font (Gotham Book) as a test but that doesn’t seem to work.
In the URL you posted above I can see that you have added the code to the HEAD successfully however you have chosen the "p" selector to apply the rule. Hype doesn't natively have a "p" (paragraph) element so therefore you won't see the font unless you place a "p" element inside the innerHTML of one of Hype's elements (a rectangle, ellipse, text, etc).
I can see that you've added a p element inside one of the elements in the scene and this is showing the correct font. So, it is working but only for text contained within a p tag.
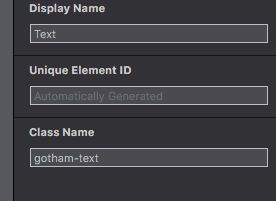
If you want the text in some elements to have this new font realised you could change the "p" selector to a class and then apply that class to whichever elements you want to have text as "Gotham SSm".
Ahh! I hadn’t looked in the info panel. Found it now, thanks for your help.
The method of adding with “Gotham SSm A”, “Gotham SSm B” just picked up the base weight 400, then that could be bolded which isn’t ideal. Specifying each weight is much better.
Hello - I’m confronting this same issue, and not having luck adding classes and assigning them in the identity panel for a text object. Setting the CSS-font-families in the Custom CSS dialog does result in successful display of the base weight font, but setting and applying the following classes in the identity panel doesn’t modify the font accordingly in situ:
Hype adds the those properties as inline CSS, so if you are using rules from a <style> tag you’ll need to add !important after the font-family and font-weight in order for that style to override.
If the weights themselves were exposed as different font-family names (maybe that’s what A and B are?) then you could add them separately as Custom CSS fonts within Hype’s Add More Fonts… panel and use them like any other font. Otherwise this is the best that can be done. (I’d like to improve how Hype deals with weights in the future…)
Thanks much for the reply and explanation! Works fine. No doubt dealing with every possible font publishing workflow isn’t trivial, and having Monotype built in is great. In our case, we have a pretty strong technical team that can handle setting up good working documents for our artists. No doubt, deeper font management will improve the experience!
Incidentally, we speculate A and B are parallel CDN distributions for failover purposes.