Netlify is a service for hosting static content and also builds static content from static site generators. For anyone creating content in Hype, it's an extremely powerful and quick hosting service for getting your Hype documents online.
A few reasons why I like it:
- Optimizes images after each upload
- Host your content on your own domain [docs]
- Generous free tier
- Drag + drop to upload, or build from a Github repository
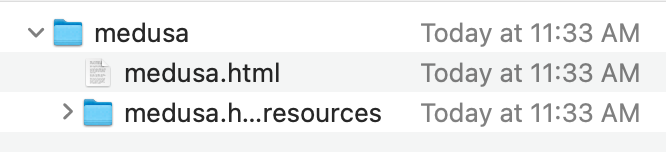
To show the process for getting your Hype export online, I'll use the 'Medusa' document from the Vector Animation Contest.
When I export it to my computer and select 'create enclosing folder' in the export pane, I get these files:
To get this instantly onto a new Netlify site, just visit app.netlify.com/drop and drag the parent folder (called medusa in this example) onto the page.

This gives you a fresh testing domain, and a URL to view your file:
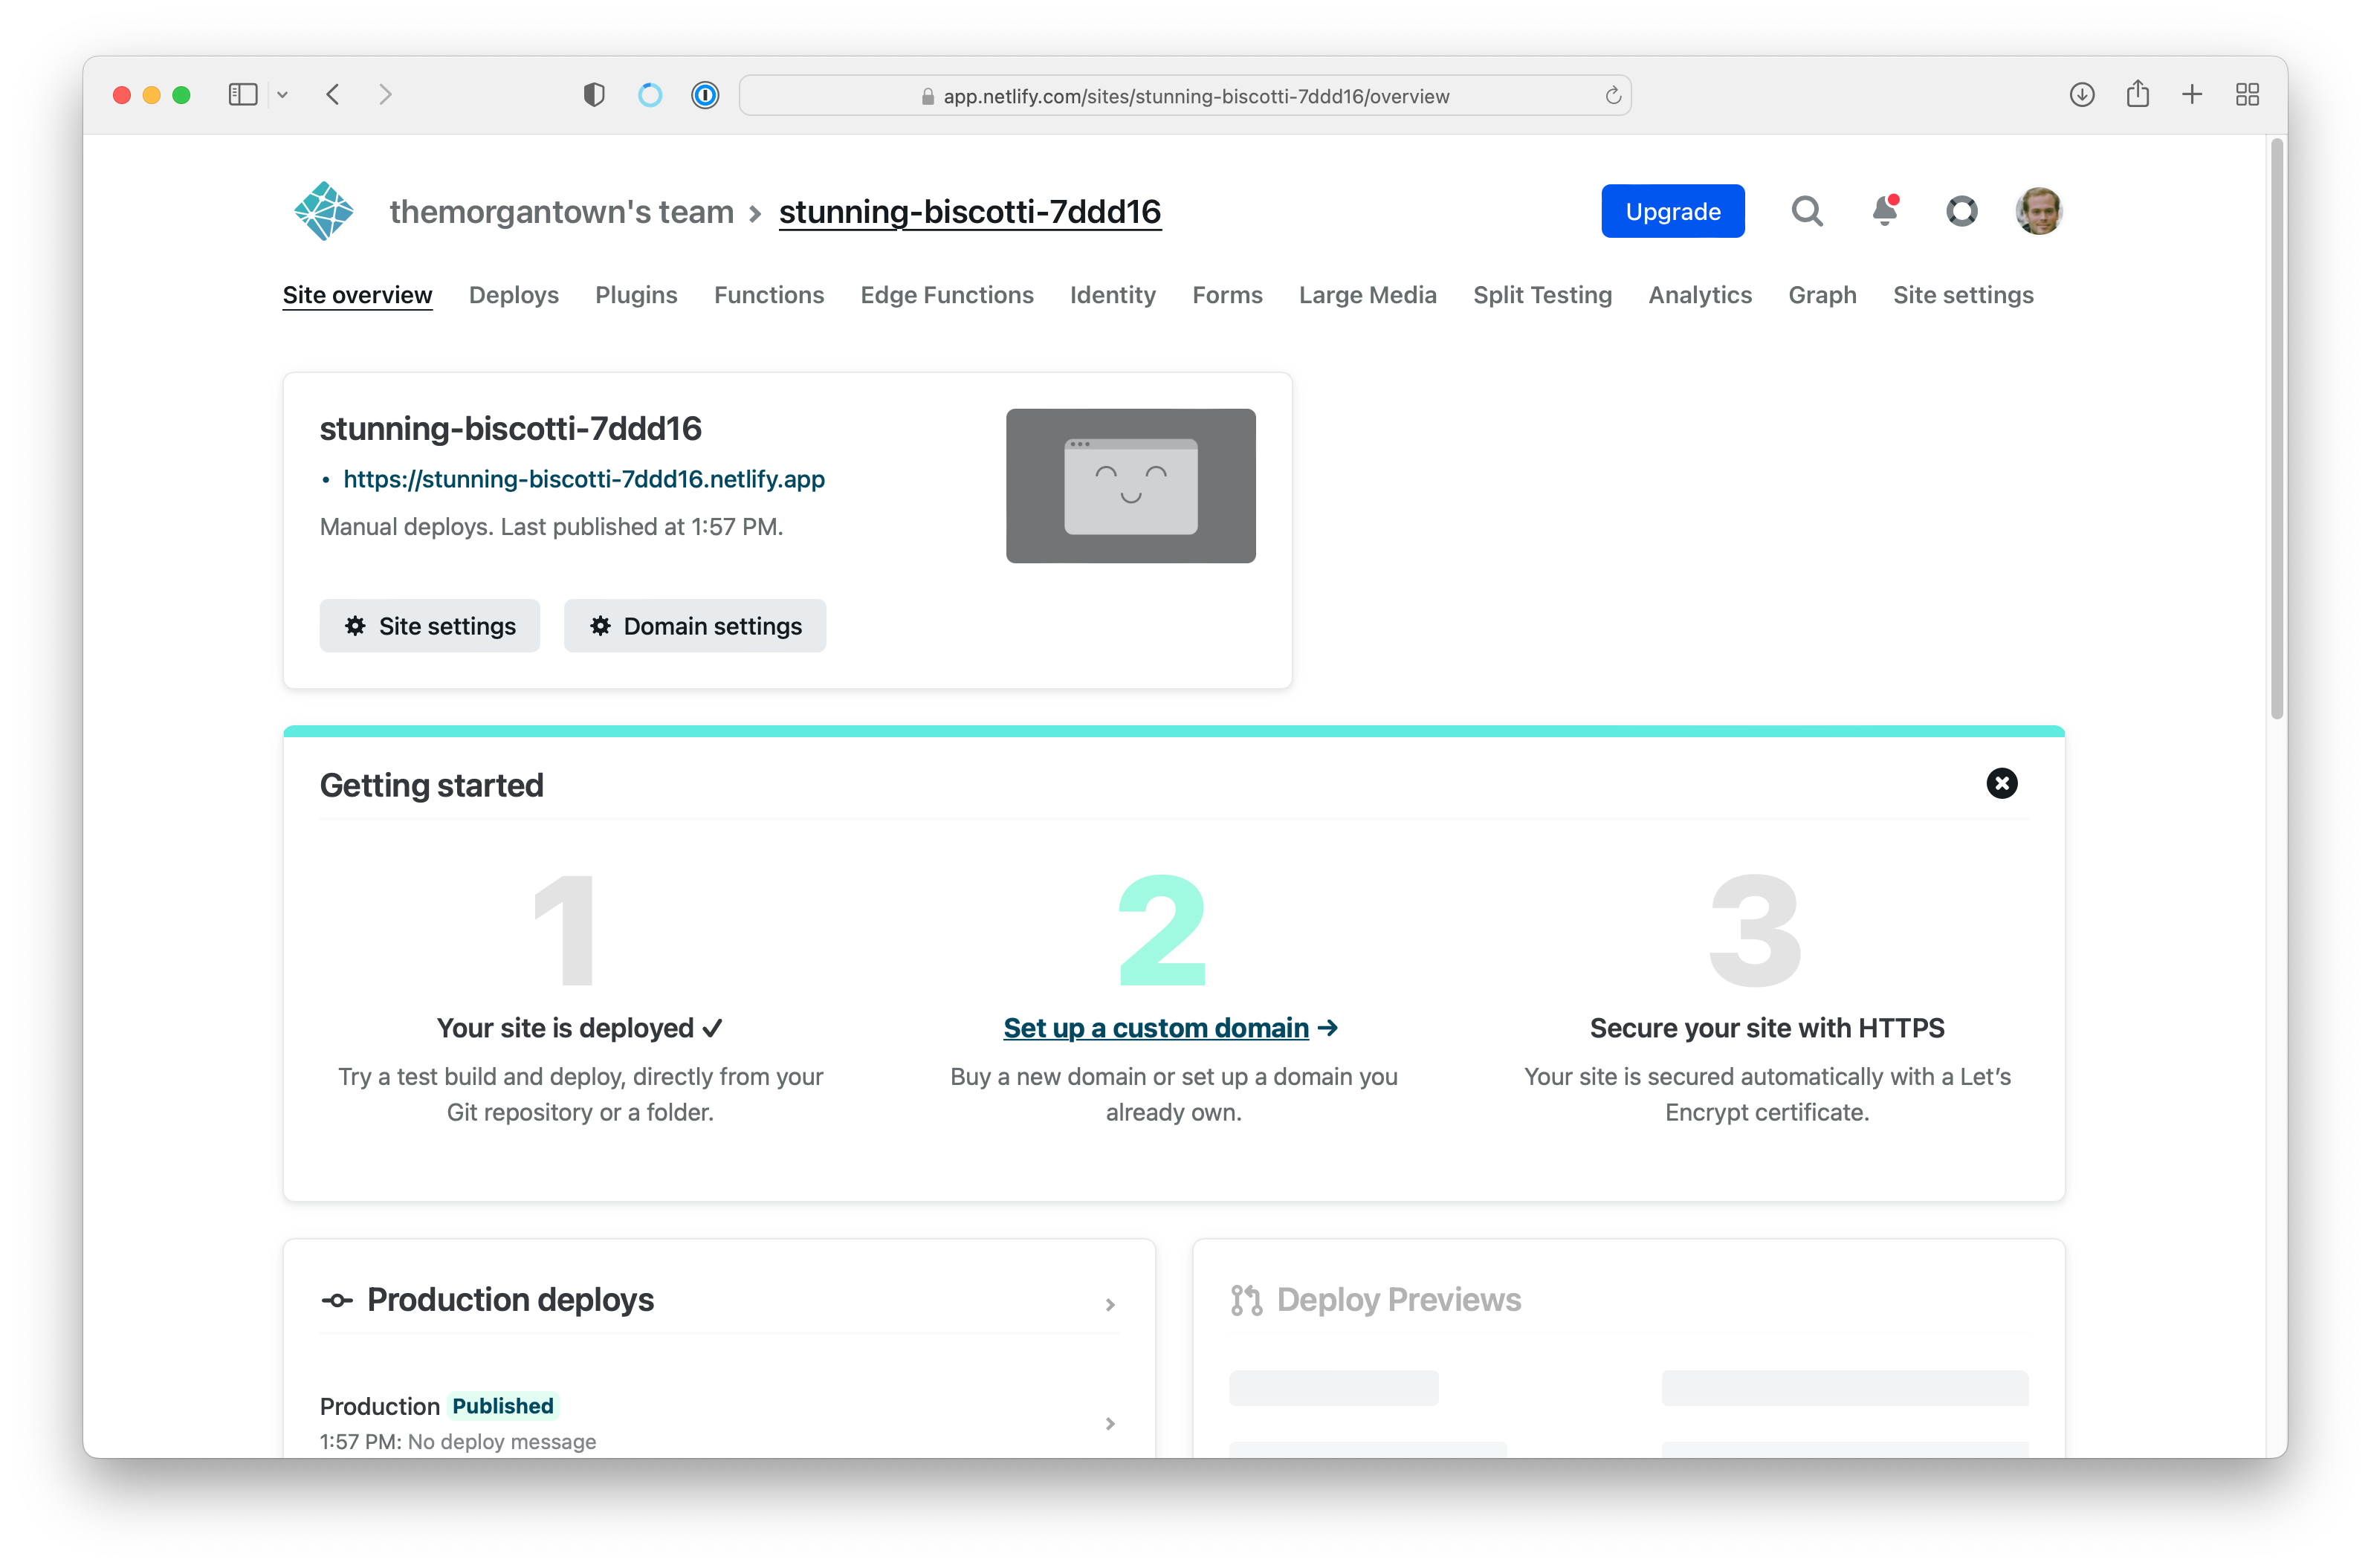
Since our export name was medusa, we then can see our resulting Hype document at: https://stunning-biscotti-7ddd16.netlify.app/medusa.html
For just sharing around a Hype document to others, this may be all you need. If you have a folder containing many Hype document exports, you can just drop that parent folder right onto the page.
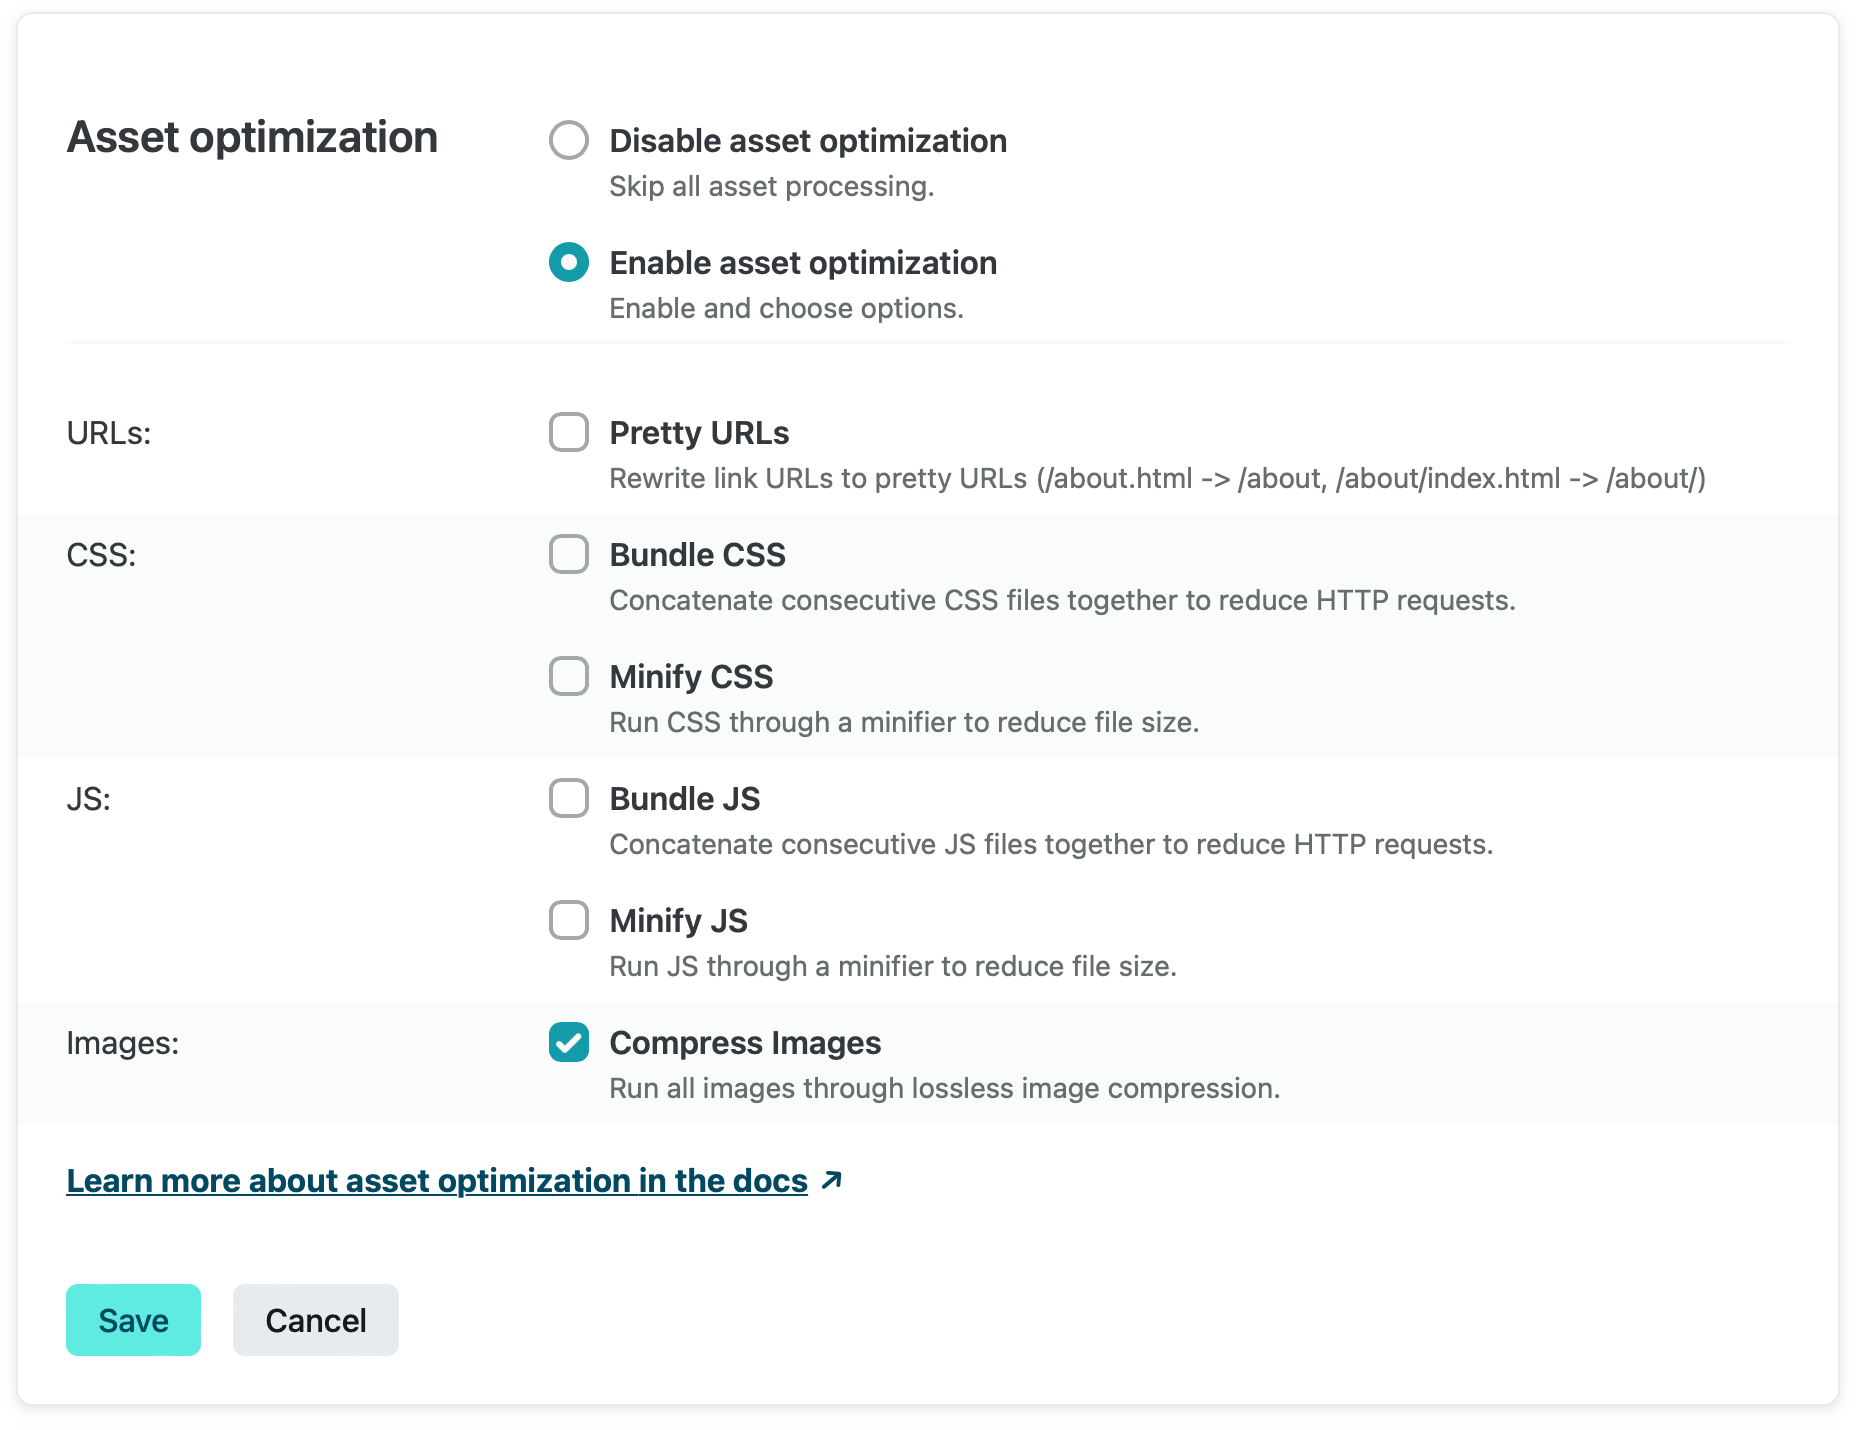
After this initial site creation, you can enable some bonus options. Click 'Site settings' and turn on 'Compress images' under asset optimization. This will make sure your images are optimized for the web and will save a few bytes. Optimization will occur on the next 'deploy'
For production sites, you may want to add things like cache-control, but for quickly sending your Hype document around, this is a great option.
Deploying on the Terminal
Once you get the hang of things, you can run a terminal command to make this even quicker:
# install the command line tool:
npm install netlify-cli -g
# enter the directory of your site folder on your computer
cd mydocument
# create a new site:
netlify deploy