Hype Style Caster

What is Hype Style Caster?

Hype Style Caster is a tool that allows you to dynamically style elements on your web page. This is especially useful for when you want to change the appearance of an element based on user interaction or other conditions on the page.

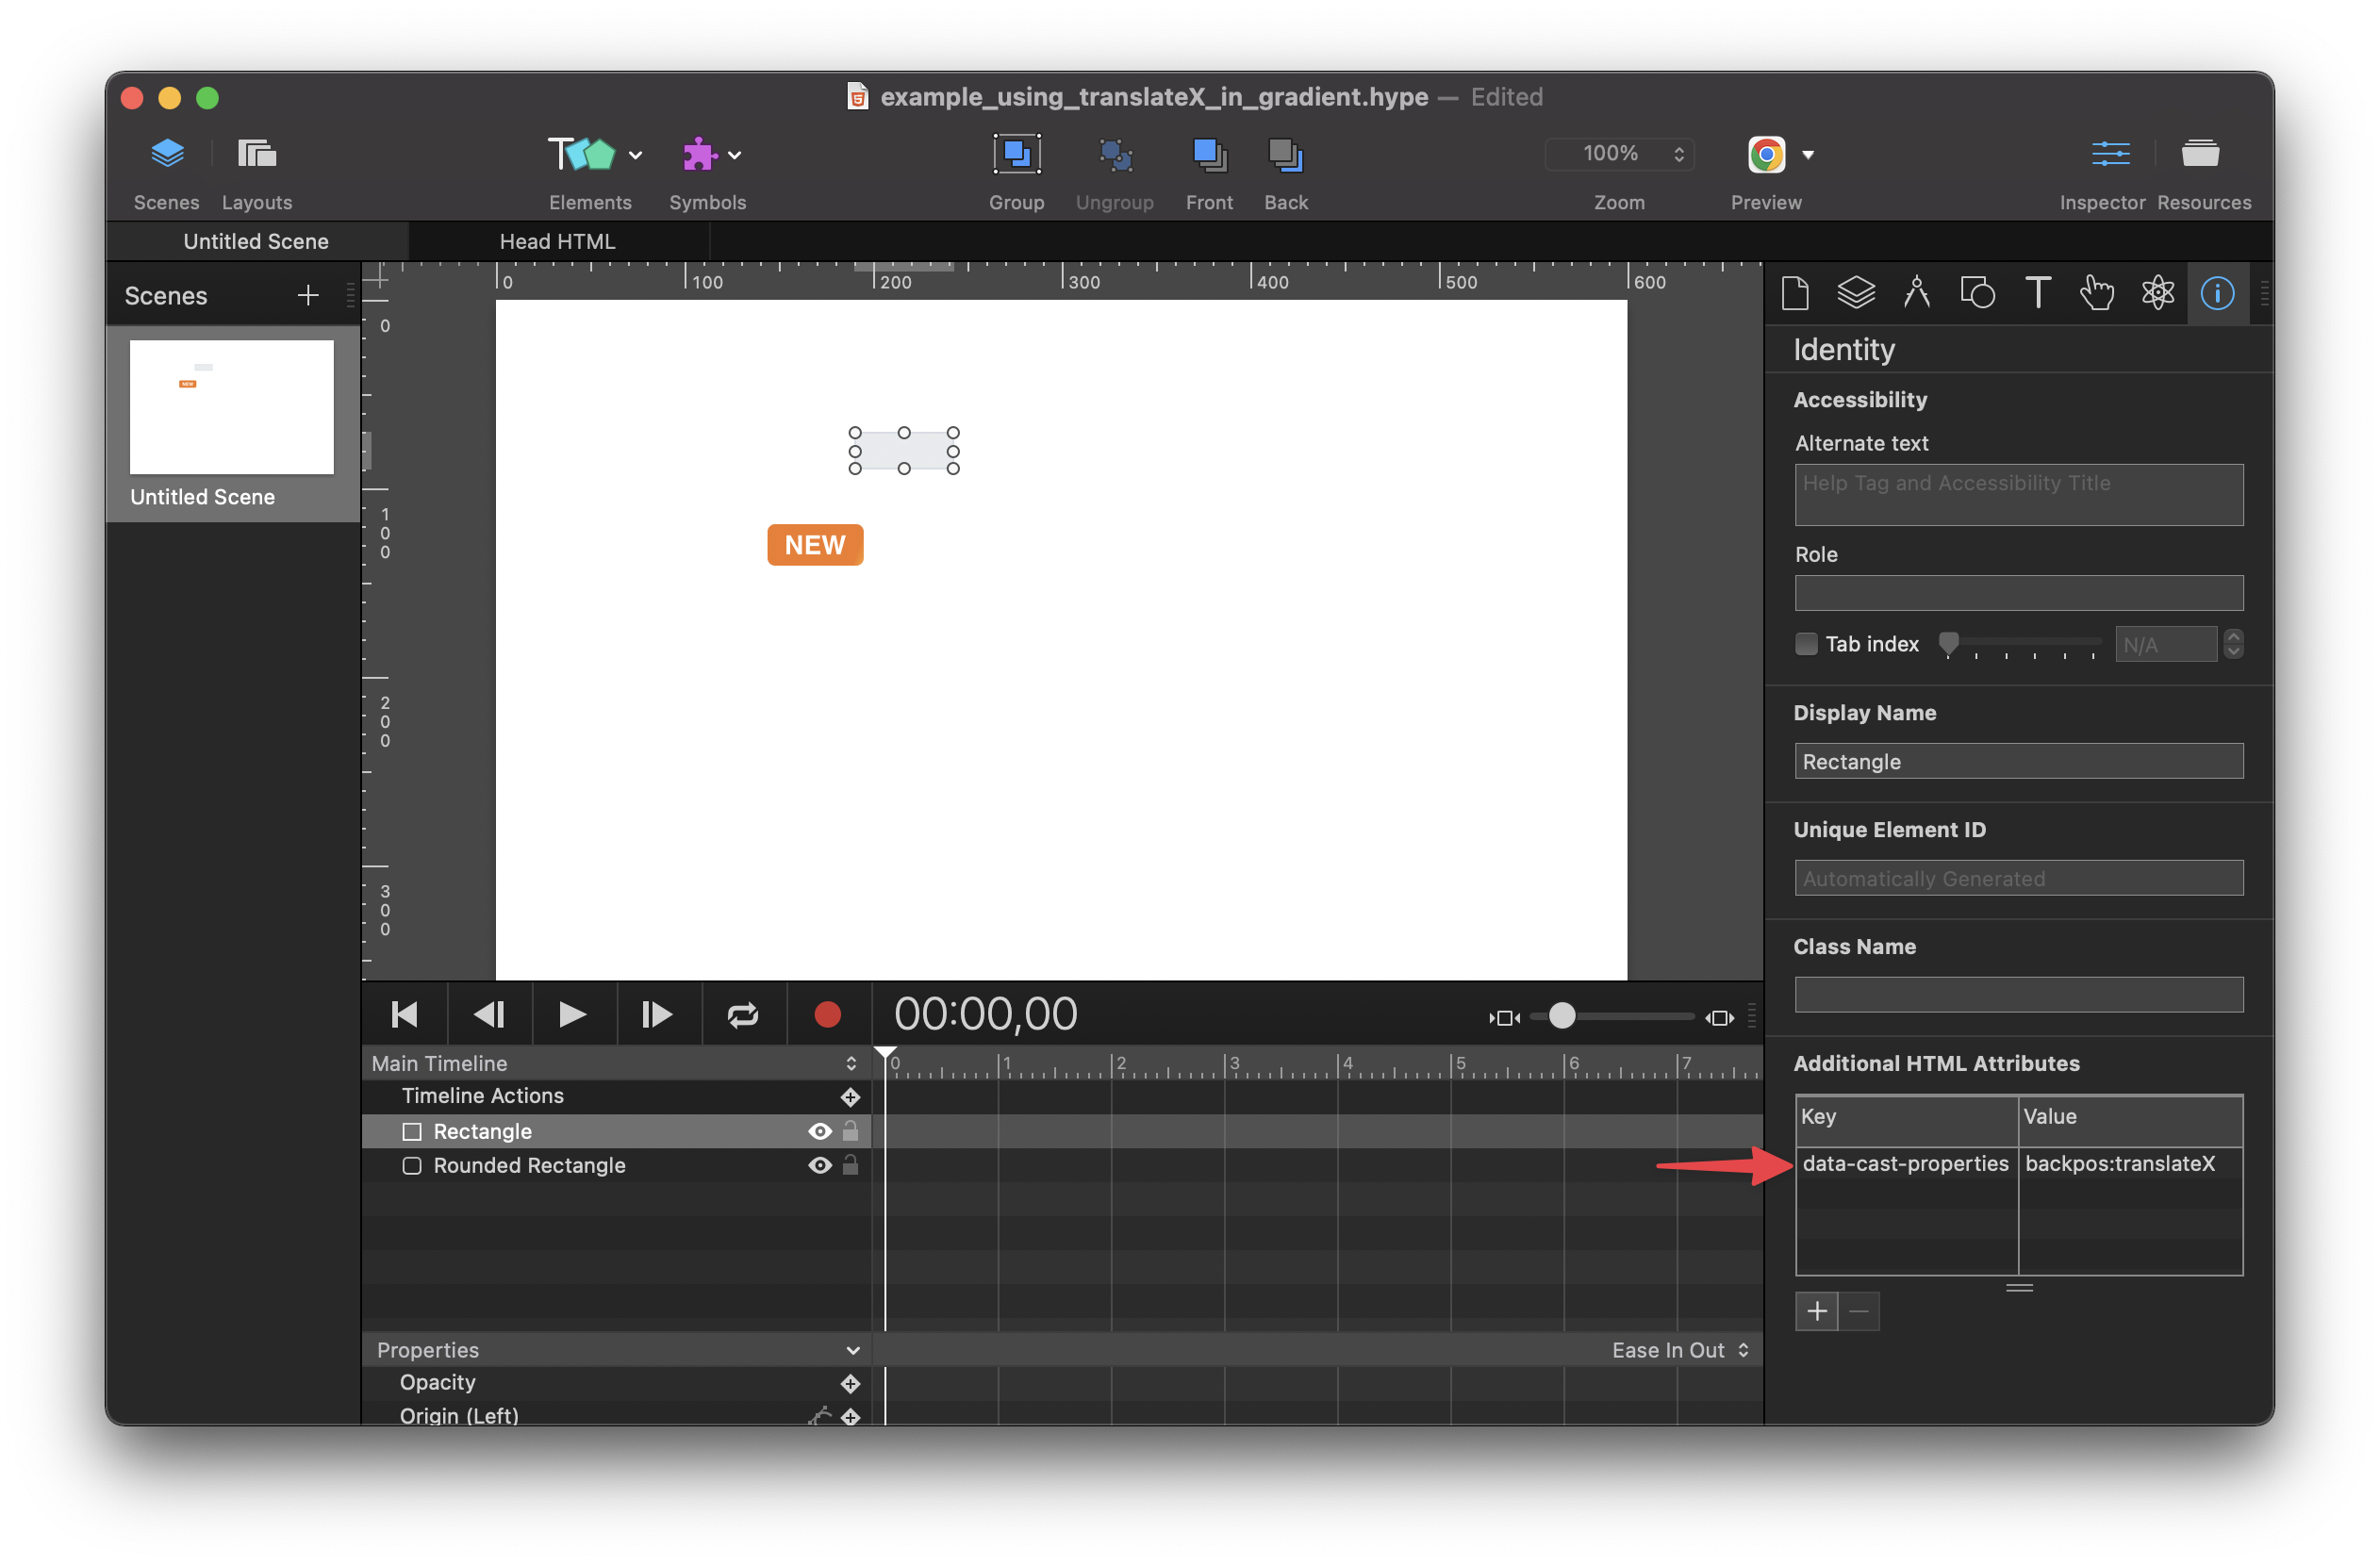
With Hype Style Caster, you can easily change the style of any element on your page, without having to write any CSS code in Head HTML. All you need to do is add a data-style-declaration attribute to the element, and specify the style you want to apply in that attribute. Hype Style Caster will then take care of applying the style to the element.

Why use Hype Style Caster over regular CSS?

Often you can do the same with just in-lining some CSS in your Head HTML! That said, there are some benefits to using Hype Style Caster. Your style's definition is included in your Hype documents and doesn't require anything to be declared in Head HTML. The dynamic benefits come into play when combining it with Hype Action Events or Hype Data Magic. They also might be useful in cases where styles should change depending on custom data.

How do I use Hype Style Caster?

Using Hype Style Caster is very simple. First, add a data-style-declaration attribute to the element you want to style. Then, in the value of that attribute, specify the style you want to apply to the element.

For example, if you wanted to change the color of an element to red, you would add the following attribute to that element:

key value
data-style-declaration color: red;

example1.hype.zip (23,2 KB)

Hype Style Caster will then take care of applying that style to the element. It will check for the validity of the CSS, create a style sheet if needed and add /update the style there. It will also apply !important to override Hypes local element styles without overwriting them.

Can I use Hype Style Caster with Hype Action Events?

Yes, you can use Hype Style Caster with Hype Action Events. Action Events allow you to specify code that will be executed when the scene is prepared for display. You can always also refresh styles defined on data-style-action by running hypeDocument.refreshStyles().

To use Hype Style Caster with Action Events, you first need to add a data-style-action attribute to the element you want to style. Then, in the value of that attribute, specify the code you want to be executed when the event occurs.

For example, if you wanted to change the color of an element to red when the user clicks on it, you would add the following attribute to that element:

key value
data-style-action element.style.color='red';

Hype Style Caster will then take care of applying that style to the element

example2.hype.zip (22,4 KB)

What if I want to change the style of an element based on other conditions on the page?

Hype Style Caster also makes it easy to change the style of an element based on other conditions on the page. For example, you could change the style of an element based on the width of the browser window, or the scroll position of the page.

To do this, you need to add a data-style-action attribute to the element, and specify the JavaScript code you want to run in that attribute. The code you specify should return an object that contains the styles you want to apply to the element.

For example, if you wanted to change the background color of an element to red or green depending on if the browser width is less than 768px, you would use the following code:

key value
data-style-action { backgroundColor: window.innerWidth < 768? 'red' : 'green' }

When the browser width is less than 768px, the code specified in the data-style-action attribute will be executed, and the background color of the element will change color after refreshes. In the example, I am also refreshing on every window resize event.

example3.hype.zip (18,5 KB)

Attention: Using data-style-action requires Hype Action Events!

Use data-style-action to change the style of an element based on the result of a Hype function

In addition to using data-style-action to change the style of an element based on other conditions on the page, you can also use it to change the style of an element based on the result of a Hype function.

To do this, you need to add a data-style-action attribute to the element, and specify the name of the Hype function you want to run in that attribute. The function you specify should return either a string containing the CSS styles you wish to apply to the element, or an object containing the style attributes you would like to apply to the element.

For example, if you wanted to change the color of an element to red when the user clicks on it, you would use the following code:

key value
data-style-action myStyle()

And in your Hype function, you would use the following code:

function myStyle (hypeDocument, element, event) {
	return { color: 'red' };
}

When the scene is prepared for display, the 'myStyle()' function will be executed, and the color of the element will be set to red.

example4.hype.zip (22,6 KB)

You can also return a string containing CSS styles from your Hype function:

function myStyle (hypeDocument, element, event) {
	return 'color: red;';
}

example5.hype.zip (22,6 KB)

Attention: Using data-style-action requires Hype Action Events!

Using data-style-declaration to set the width, height and position of elements in a Hype symbol

CleanShot 2022-05-29 at 11.24.14
example6.hype.zip (188,4 KB)

One of the great things about using the data-style-declaration attribute is that it gives you a lot of control over how your elements are displayed. This is especially useful when working with Hype symbols, as they don't support the built-in flexible layouts method (yet).

With the data-style-declaration attribute, you can easily set the width, height and position of elements. For example, to set the width of an element to 50%, you would use the following code:

key value
data-style-declaration width: 50%

To set the height of an element to 100%, you would use the following code:

key value
data-style-declaration height: 100%

You can also use the data-style-declaration attribute to set the width, height and position of elements using the calc function. For example, to set the width of an element to 100% of the width - 100px of the Symbol and the left position to 50px, you would use the following code:

key value
data-style-declaration width: calc(100% - 100px); left: 50px;

In the following example, the element's font-size is set as clamp(20px, 5vw, 50px) . This means that the font-size will be set at 20px , until the computed value of 5vw becomes greater than that of 20px . At this point, font-size will be set at 5vw , until 5vw 's computed value becomes greater than that of 50px . At this point, the font-size will be set at 50px . clamp() allows you to set a minimum and maximum value.

key value
data-style-declaration font-size: clamp(20px, 5vw, 50px)
7 Likes

↑ look at project
1.0.3 Added data-style-var for mirroring mutations to CSS variables, Added data-style-closest to define a closest selector to set these on

From now on, you can use data-cast-properties to mirror mutations to CSS variables. This makes it easy to keep track of changes and ensure that the styles are always up-to-date. Additionally, data-cast-to-closest allows developers to define the closest selector to set styles on. This makes it easy to target specific elements and ensure that the styles are applied correctly. Overall, this is a powerful approach that offers a variety of features that make it easy to use and customize interdependent style changes, as the variables can be used in any element style setting and offer you to easily create responsive designs. You can also use it to create animations based on other element properties.


key value
data-cast-properties foo

Sets the values --foo-width, --foo-height on the Hype scene root.


key value
data-cast-properties foo
data-cast-to-closest .bar

Would set them on the closest element matched by .bar(upwards search).


Update: refactored naming, so I updated them in this post as well

1 Like

↑ look at project
1.0.4 Added monitoring and setting any value of style or transforms, Added the possibility to cast the values (int, float) and register new casting functions

This update contains an upgraded data-cast-properties system and parser. It now allows requesting any style value or transform value to be set as a CSS custom property.

key value
data-cast-properties foo

Will now only monitor width and height by default. Hence, it will yield --foo-width and --foo-height (full value including units).

key value
data-cast-properties foo:height, translateX

Would in turn yield --foo-height and --foo-translateX (full value including units).

New in 1.0.4 is casting

key value
data-cast-properties foo:(int)width, (float) translateY

Would in turn yield --foo-width-int and --foo-translateY-float (not including units and parseInt and parseFloat have been used to cast the values).


Built-in functions are int (parseInt) and float (parseFloat).
You can also register new casting functions. Either to cast or use them for transforming a value.

HypeStyleCaster.registerCastingFunction('double', function(value){
    return parseInt(value)*2
})

example7.hype.zip (23,5 KB) … The green rectangle and the red polygon are positioned by CSS custom properties, the yellow rectangle produces! Comes in really handy and offers a ton of layout possibilities.

example8.hype.zip (24 KB)The text sets its color as CSS custom properties, and the rectangle is mirroring it.


Update: refactored naming, so I updated them in this post as well

1 Like

(Brainstorming here, as I like the notion of "style caster" more than generic "dynamic styles")

  • data-style-* (css, pseudo etc.) for styling the elements
  • data-cast-* (vars/props/attributes) for when you want to dynamically change the appearance of an element based on user interactions or other conditions on the page

Hence, we make the distinction more clear. This also makes it easier to understand the tools and their purpose. It is also nice to have the option to use either one or the other, or a combination of the two.

This naming convention is more descriptive of the tools purpose. It also helps to understand the difference between the two a little better. As humans, we tend to categorize things in groups and sub groups. When we make a distinction between two elements, we tend to associate an element with the category it belongs to. When we make a distinction between two elements, and give them a name, we tend to associate an element with the name it belongs to. This is called the “stereotype effect”.

↑ look at project
1.0.5 Refactored name to Hype Style Caster, Refactored data-style to data-style-declaration, Refactored data-style-cast to data-cast-properties, Refactored data-cast-target to data-cast-to-closest, Added data-cast-to-target


Mainly refactoring, added string casting (quotation marks), but also added new targeting for casting.

key value
data-cast-properties foo: translateX, (int)translateX
data-cast-to-target .bar

Would set them on the first element matched by .bar(search in current scene). It would then set the following properties on it --foo-translateX and --foo-translateX-int.

1 Like

CleanShot 2022-06-13 at 10.53.46

example_using_translateX_in_gradient.hype.zip (16,7 KB)

In this example, you can use the translateX value to drive the background-offset of another element. If you add a sensible gradient, you can create some nice effects. Here we are trying to achieve a "shine" effect.

As you can see, casting the value as a CSS custom property (also known as CSS variable) is pretty easy. Here we are casting the property translateX to the variable scope backpos resulting in --backpos-translateX. In the above animation preview, you can see that it now only needs to be assigned to background-position using var(--backpos-translateX). The calc (short for calculation) command isn't really necessary. I am only using it to adjust the offset a little.


Hint: CSS is pretty unforgiving in its notation. So, when assigning a var it needs to have the correct format (px, number, % etc.) also don't write var (---something) it has to be var(---something). As you can tell, the whitespace between the operation and bracket throws it off. On the other hand, when using calc you have to add a whitespace inside the formula like calc(var(--something) + 10px) as calc(var(--something)+10px) wouldn't work!

3 Likes

CleanShot 2022-06-13 at 23.08.18

Using a radial dial that disappears when not in the Hype IDE…

example_using_translateX_in_gradient_radial.hype.zip (18,4 KB)

1 Like

↑ look at project
1.0.6 Fixed updateTree by storing it document specific in _local

The radial blur appears a bit smaller in the IDE (I guess because of the stage dimensions). This is an example of using the vars on a multi location background. Dots are hidden in published/preview document. The above video was recorded in the IDE.
example_using_vars in_gradient_color_offset.hype.zip (40,9 KB)

3 Likes

CleanShot 2022-06-16 at 00.53.37

I'm still using radial gradients, but this time inside a text. Next I might try a cast function that calculates a angle between two color points and makes a linear gradient.
example_using_vars in_gradient_color_offset_on_text.hype.zip (44,0 KB)

4 Likes

↑ look at project
1.0.7 Allowing variable name additions that can be inherited, Added the ability to set default properties


Using data-cast-basename is now inherited by elements that cast values. This was added to use symbols casting a variable like slider to be reused to drive multiple variables. The basename is prepended.

For example casting

key value
data-cast-properties slider:translateX

and having the following

key value
data-cast-basename green

on a group or symbol containing the casting element, sets the value --green-slider-translateX instead of --slider-translateX on the Hype scene root.

2 Likes