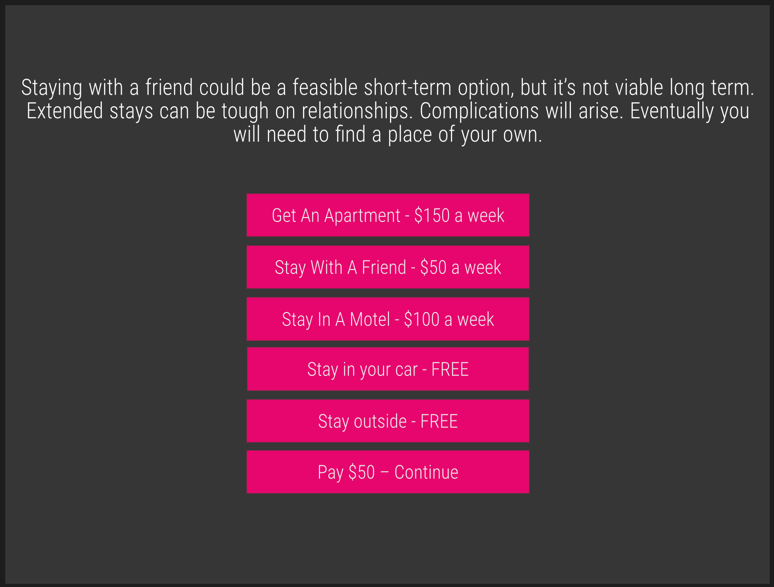
There are several buttons that the user can choose based on the situation. I want them to show if they are needed, and not, if they aren’t. For example, if the user chose to live with a friend and that didn’t work out, buttons for the other choices should show up and the button for “Stay With A Friend” should be hidden, and the existing displayed buttons should slide up so there are no gaps.
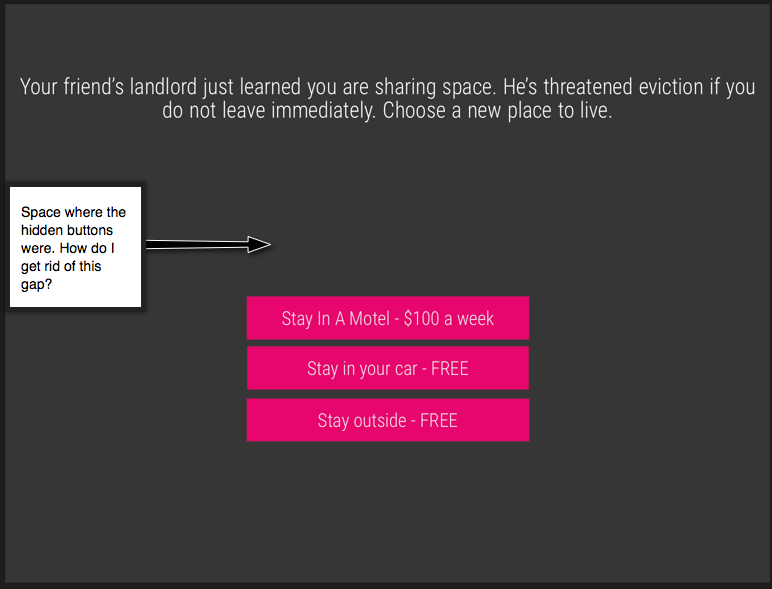
I apologize if there’s a thread that covers this. I did several searches for it, and came back with a number of hits, all which seem to be having issues getting the element to hide. In my case, the code hides the button, but leaves a gap where the button used to be. What you’d would expect from the visibility or opacity properties.
The issue in the attached project is in the scene LVGPROB and JavaScript function randLiving(). Let me apologize for my code in advance.
Hide an Element - display:none or visibility:hidden?
Hiding an element can be done by setting the display property to none. The element will be hidden, and the page will be displayed as if the element is not there: (my edit: i.e. other elements move to fill the space).
Example
h1.hidden {
    display: none;
}
_**visibility:hidden;**_ also hides an element.
However, the element will still take up the same space as before. The element will be hidden, but still affect the layout:
Example
I knew about the display: none vs. visibility: hidden. For some reason the display:none is acting like the visibility hidden as it leaves an empty space where the button was.
I didn’t know about the SlideUp/SlideDown CSS properties though. That looks interesting.
I don't know if it's because I placed the buttons on the page one after another using Hype (instead of hardcoding the HTML), but then try and manipulate them later on using JavaScript.
Gave your project a going over (great concept~layout idea) and I’m not sure why Hype is a better choice than a straight HTML set-up with CSS animations. Getting the spaces to fill up would involve coding anyway - I couldn’t see a way that Hype’s own native animation would do the job.
But suppose instead of having a magenta bar disappear, it’s opacity or saturation simply was lowered - as a visited link is sometimes is displayed… Or when clicked, the bar disappears, but there is another bar underneath it that shows the “visited” status in some fashion (or an innerHTML approach - but that seems like a lot of extra work). With this approach You wouldn’t have to fill up the “blank” spot.
Well, I had been planning more complex animations (which are not in there yet) and it seemed to make sense for some of the navigation too and, I love Hype.
That's a great idea! I will give that a shot. Thank you!
Both versions are great, but I think I like the second one a little better. However, I am skittle less clear on how it works. I guess I should say on what I need to do to get it to work.
I have another approach for You - one that involves no coding and only requires Hype’s built-in capabilities, is simple to set up, and quickly adapts to to a variable number of buttons. It is also easy to reuse for other scenes or projects.
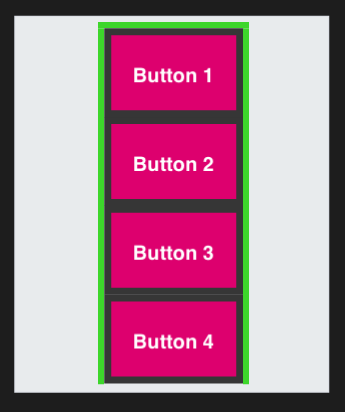
The basic idea is You use Hype’s “Physics” engine to float the menu buttons. The menu buttons are hemmed in by (3) static elements - constraints (left, top, right) - that hold them in position… think of helium balloons in a box just wide enough for one balloon and tall enough to hold all of them in a column. When the viewer clicks on one of the buttons its display is set to “none” and then moved laterally out of the button grouping. This lateral movement allows any buttons underneath it to float up to the next empty space.
The screen shot below shows the (3) constraints around the buttons, here shown in lime green for ease of viewing - but would be set to a Fill style of “None” (invisible) in actual use.
“Constraints around the buttons”
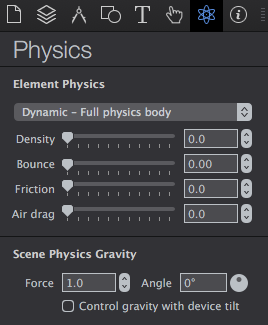
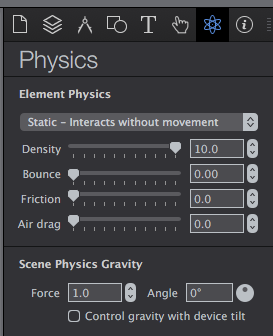
**Next select all the Menu buttons** and, using the _Physics Inspector_, choose "Dynamic-Full Physics Body" as per the screen shot below. I set all but one field in this panel to "0". I left the "Scene Physics Gravity" at "1.0". This is my first time using the Physics Engine so these numbers are suggestions only - You might find better settings for your needs - experiment!
**The lime green constraints** (please see the screen shot above) are set to "Static - Interacts without movement". They will not budge and hold our floating Menu buttons in place.
One more procedure: Create a unique short timeline (I used 1/10th sec in my attached Hype example) for each button. This timeline will control the “display” & “left origin” You can copy and paste the settings from one timeline to another because the settings are identical for all buttons. Hiding & moving elements using code by itself will not trigger the Physics - at least in my experiments - a timeline needs to run.
Total time to create this “floating” menu interface - less than three minutes (excluding button design or button code You wish to execute); and once created it is easy to copy & paste the interface. Very adaptable.