Apologies for a novice question, but I can’t find the answer.
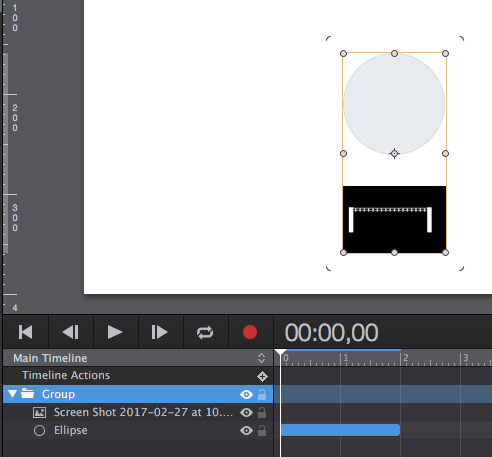
I’ve created an animation using an ellipse as a proxy for an image that I want to move from left to right.
The ellipse is working great. I then placed the svg image and grouped it to the ellipse. However I the items don’t move together as I expected. Is it not possible to add images to an existing animated object “after the fact”?
That won’t work as you can see that the ellipse is the only thing being animated.
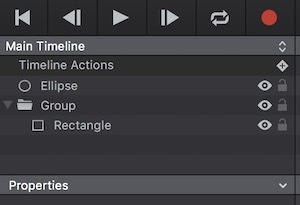
What does work is create the ellipse, group it (with itself), animate that group then put in anything you like into that group.
But maybe I get you totally wrong, my apologies if so.
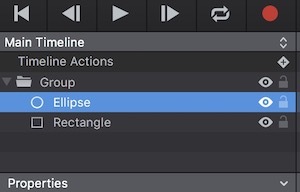
Rick - I think you have me right. I’ve selected the animated ellipse and grouped it with itself. But how do I add items to that group as you are suggesting?
You can see an example of what I’m doing in the first scene of the attached hype file. I’m hoping to make the violin bow move in accordance with the ellipse.
BTW, if you know of a more elegant way to achieve this, please let me know. I’m a complete novice. Thank you so much for replying!
I noticed You have the ellipse behind the violin - and I assumed the bow should be over the violin. In this situation grouping will not work because the ellipse then be placed over the violin.
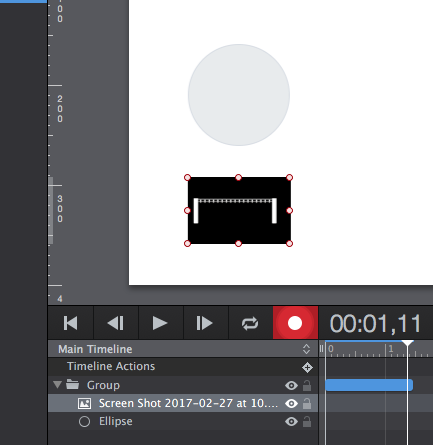
What I did in this Demo was to copy the motion path from the ellipse (in the Timeline layers), select the bow in its Timeline layer and paste the ellipse’s motion path to the bow (making sure the Timeline matched the starting point of the ellipse - in this case “0”).
You can tweak the motion path of the bow - especially in regards to where I have the bow located.
==========
Alternatively if making the ellipse transparent would be OK (say a value of 65% as per your original) as a replacement simulator for your “under the violin” effect, then You could group ellipse & bow - also assuming the ellipse & bow are always positioned in the same spot in relation to each other. Once You establish the motion path for the group You could adjust the transparency of the ellipse as it passes over the violin to match your original effect.
The ellipse’s motion path will not work well for a straight copy~paste to the ellipse & bow grouping (I tried it). You would be best off simply creating a new motion path for the ellipse & bow grouping (and eliminating the one for the ellipse). With just one motion path for the group you won’t need to futz with separate paths for the ellipse & violin (though that would still be good solution).
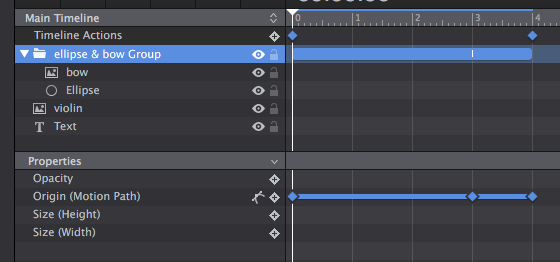
Screen Shot “ellipse & bow” group - notice it is the group that has the motion path.
FYI, the ellipse should have been on an upper layer, that was just my error. And actually the ellipse itself doesn’t need to be part of the final animation. It just seemed to be more convenient to animate an ellipse instead of the bow itself.
Didn’t realize I could copy and paste a path in the timeline; thanks for that!
I will be needing to do several of these in slight variation, so any other tips to make it easier would be great. For example, is there a simple way to reverse the animation? That is, the bow begins on the right and moves to the left? I mean without creating a brand new path/keyframe?
Thanks again guys, very friendly and helpful forum here!
You can swap the starting & ending keyframes of the motion path (by dragging them) - but You will probably need to make some adjustments to the path in the animation window to fine tune the mid-parts of the motion path.
**Or**
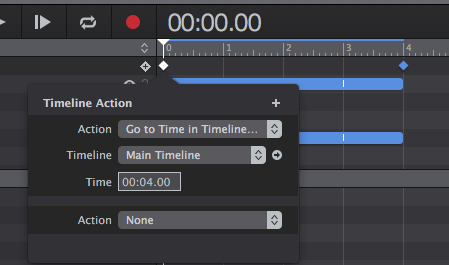
In the Timeline actions first keyframe at "0" (where You have "Play sound") :
Add a "Go to Time in Timeline..." action.
In the image below I set it to "4.00" - the end of the Timeline.
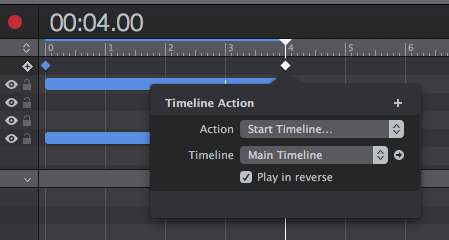
THEN
Open the last keyframe - where You have "Start Timeline" - click the checkbox "Play in Reverse".